Parent’s Corner
MDXONE · For the grown-ups
Parent’s
Corner
Practical tips, harness how-tos and real-world guidance for helping little riders learn with confidence.
Small steps. Shared mountain time.
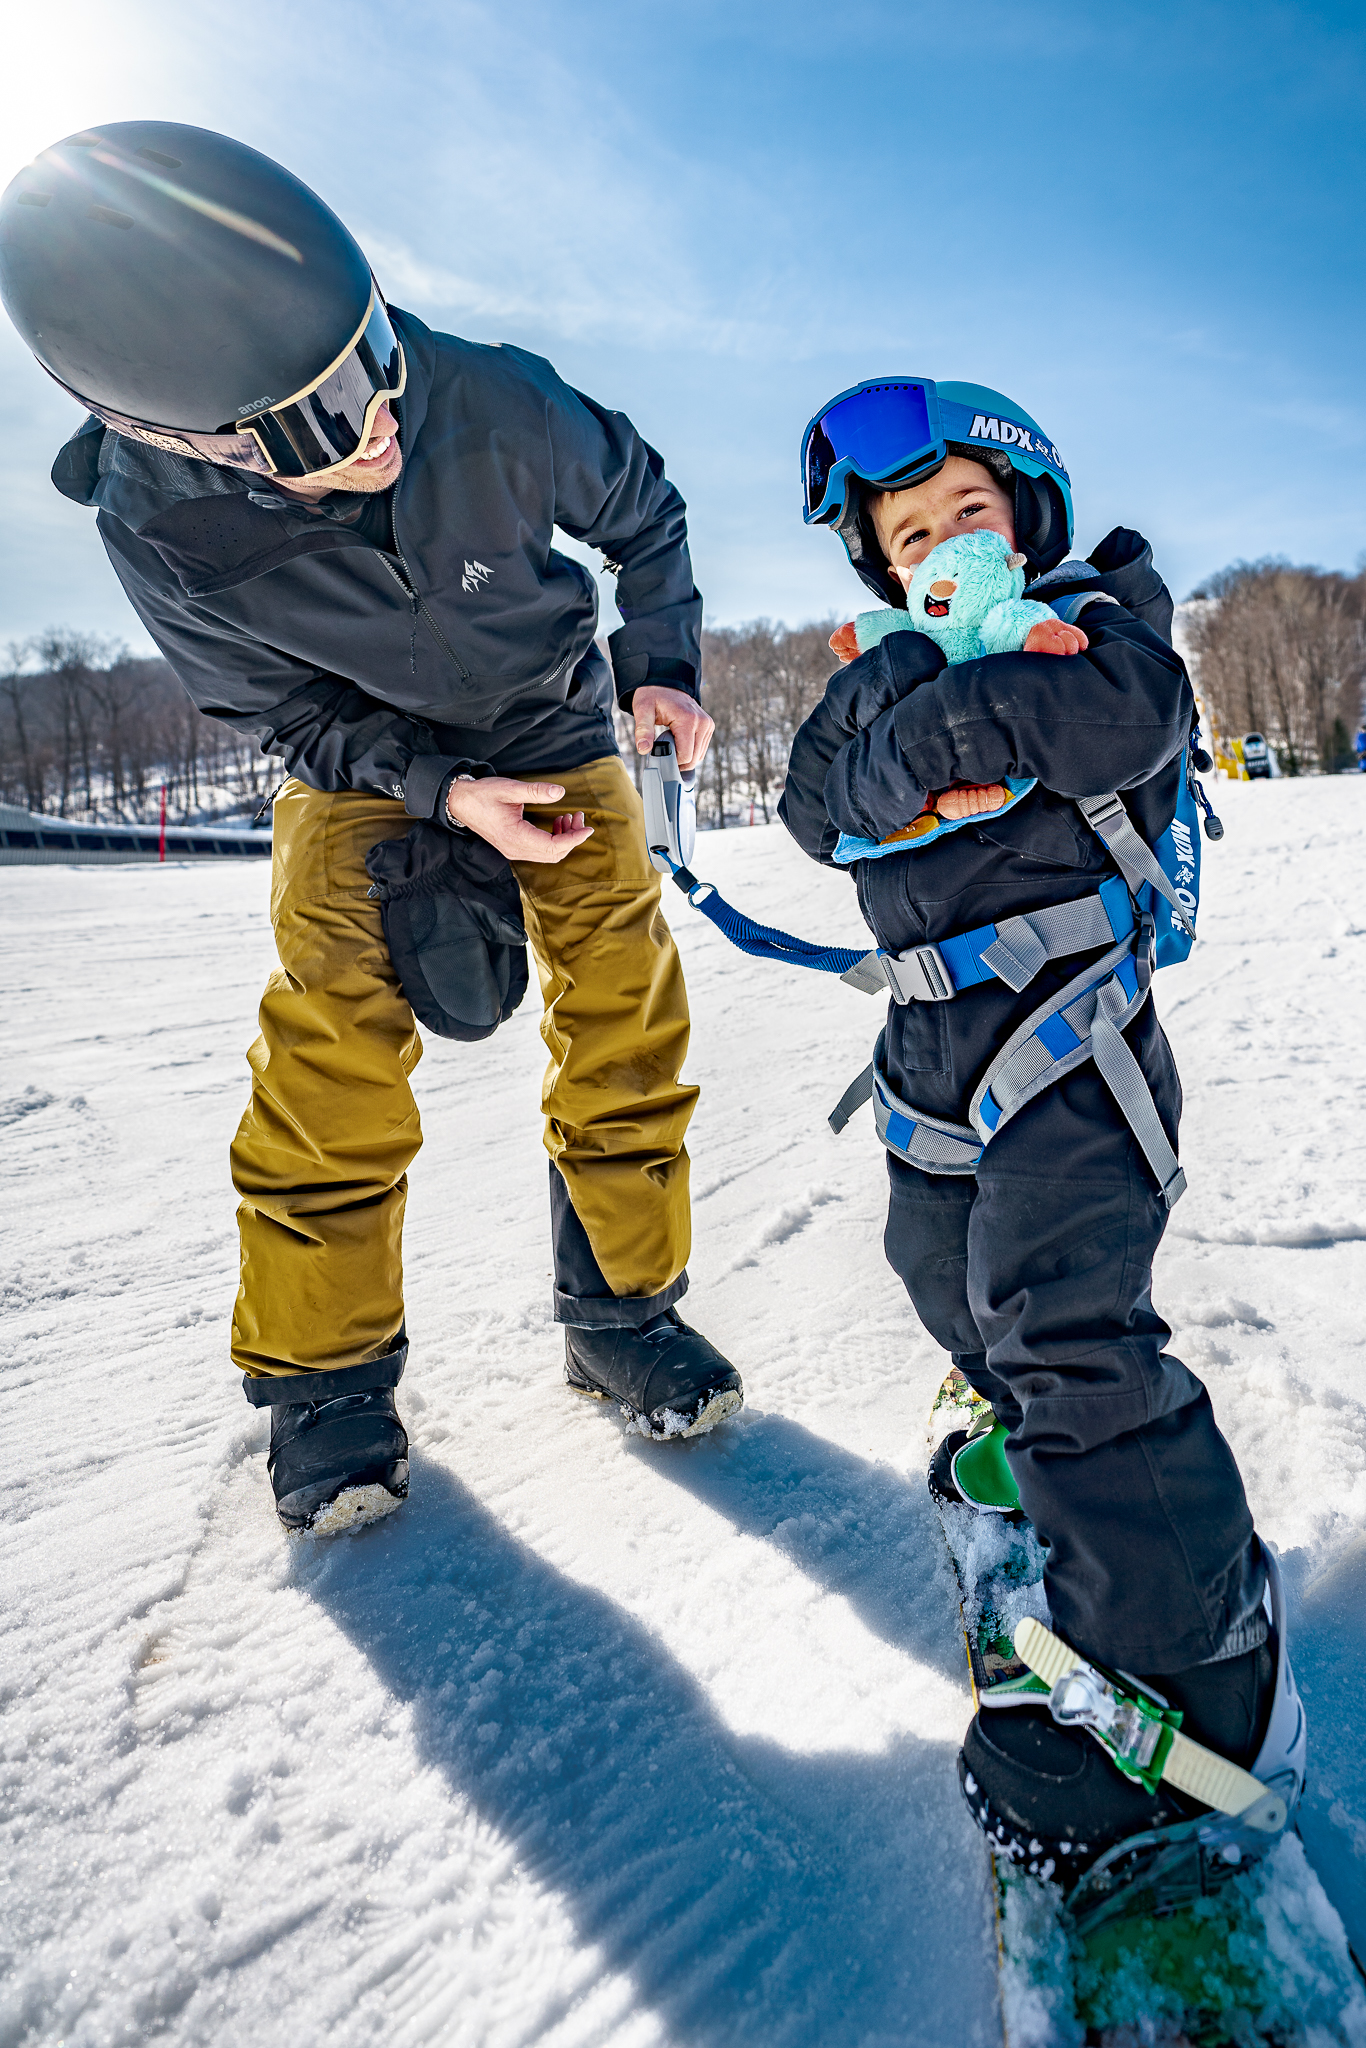
Start here
A little guidance
before you go.
See the MDXONE snowboard harness in action. Then explore the setup reminders and step-by-step guides below, at your own pace.
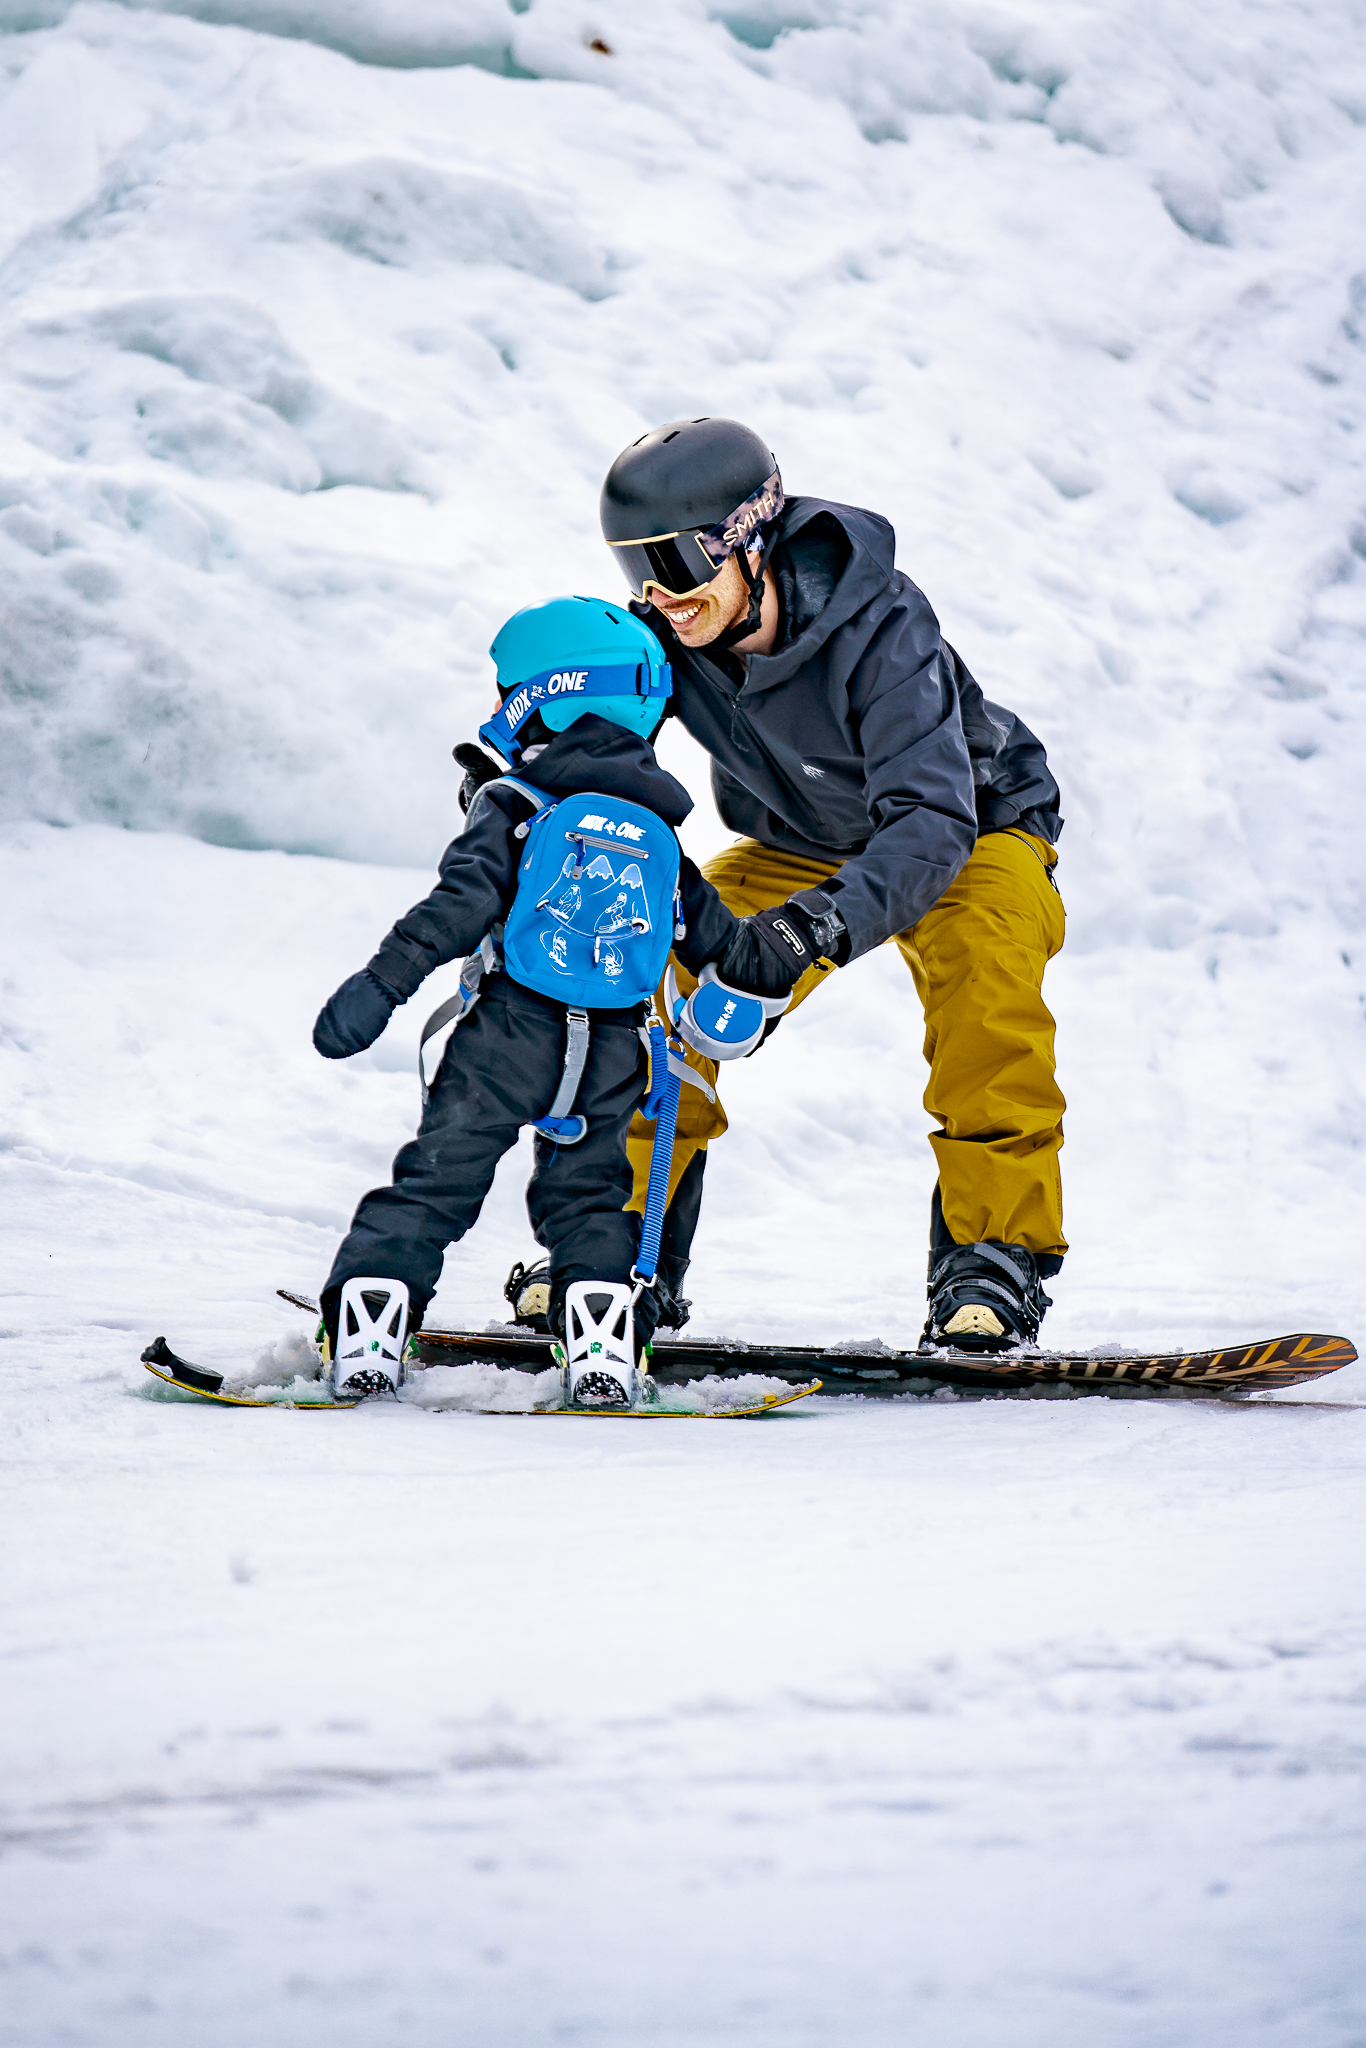
Before you ride
A few checks.
Then time together.
Take a moment to get set up before the first pull or run. Keep the instruction manual handy as you check the harness and leash.
- 1Check the fit
Make sure the harness is fitted properly, following the manual.
- 2Check buckles and straps
Check that the buckles are clipped and the straps are adjusted.
- 3Tuck away loose ends
Use the strap pouches to store extra strap length.
- 4Get the leash ready
Review the connection and leash instructions for the activity you’re about to try.
One stage at a time
Easy as 1, 2, 3.
Pull → Walk → Ride. Start with the basics and revisit each stage as needed. Open any graphic for a closer look.
Pull
01 / 03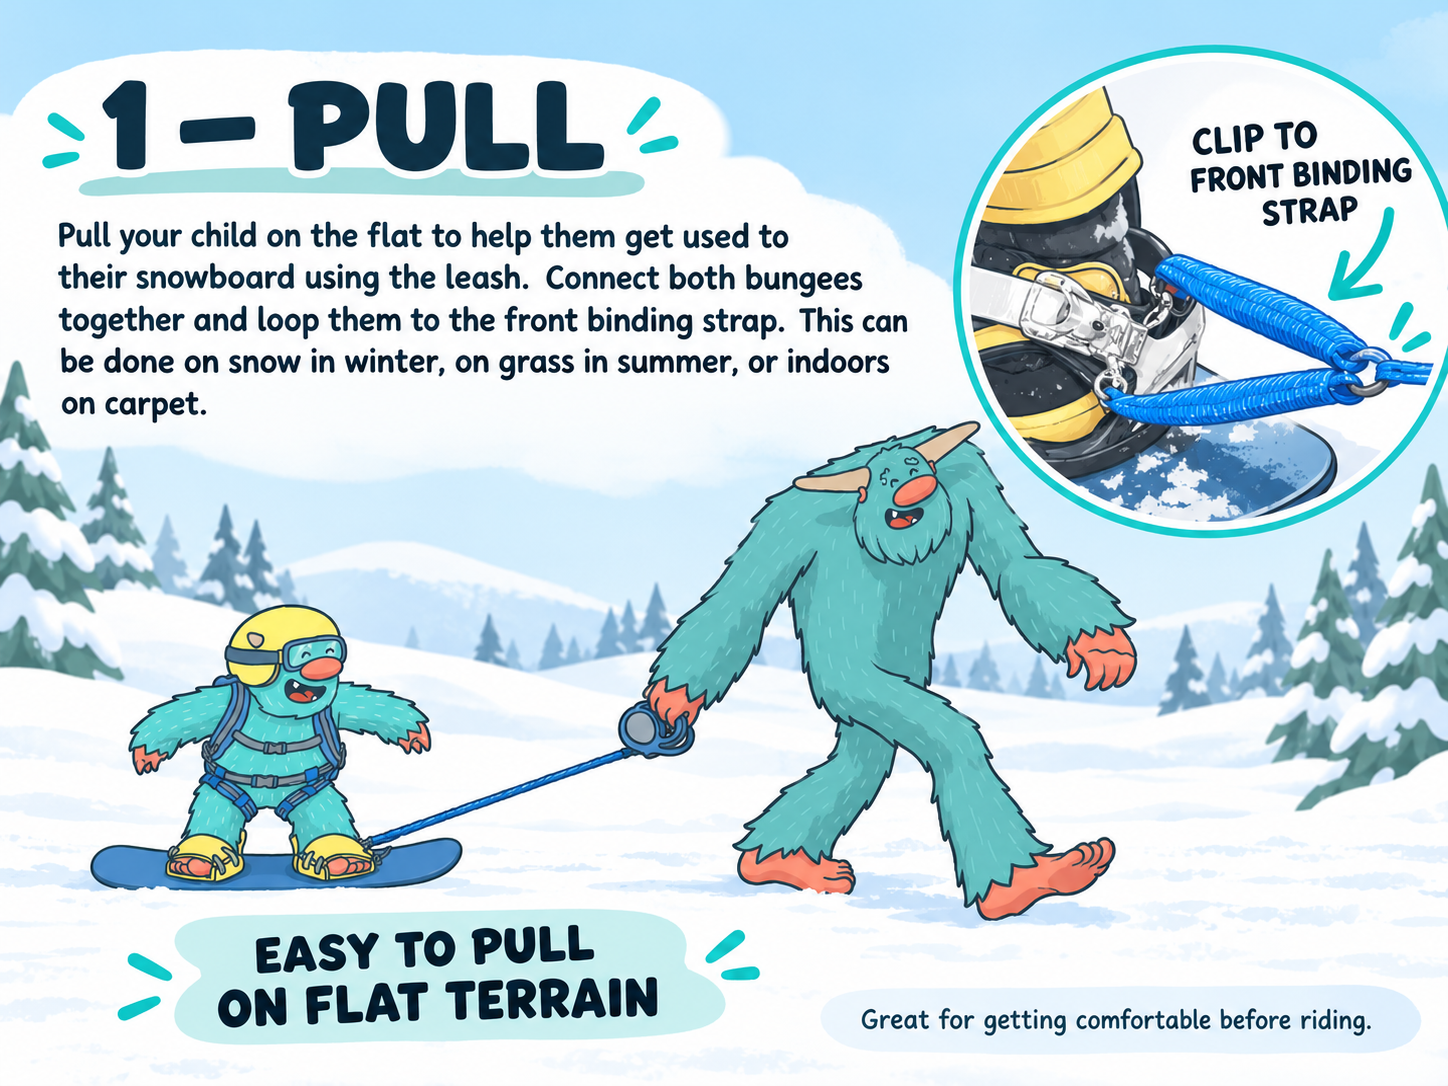
A first feel for the board. Start on flat ground using the setup shown in the guide.
View Pull guide (opens in a new tab)Walk
02 / 03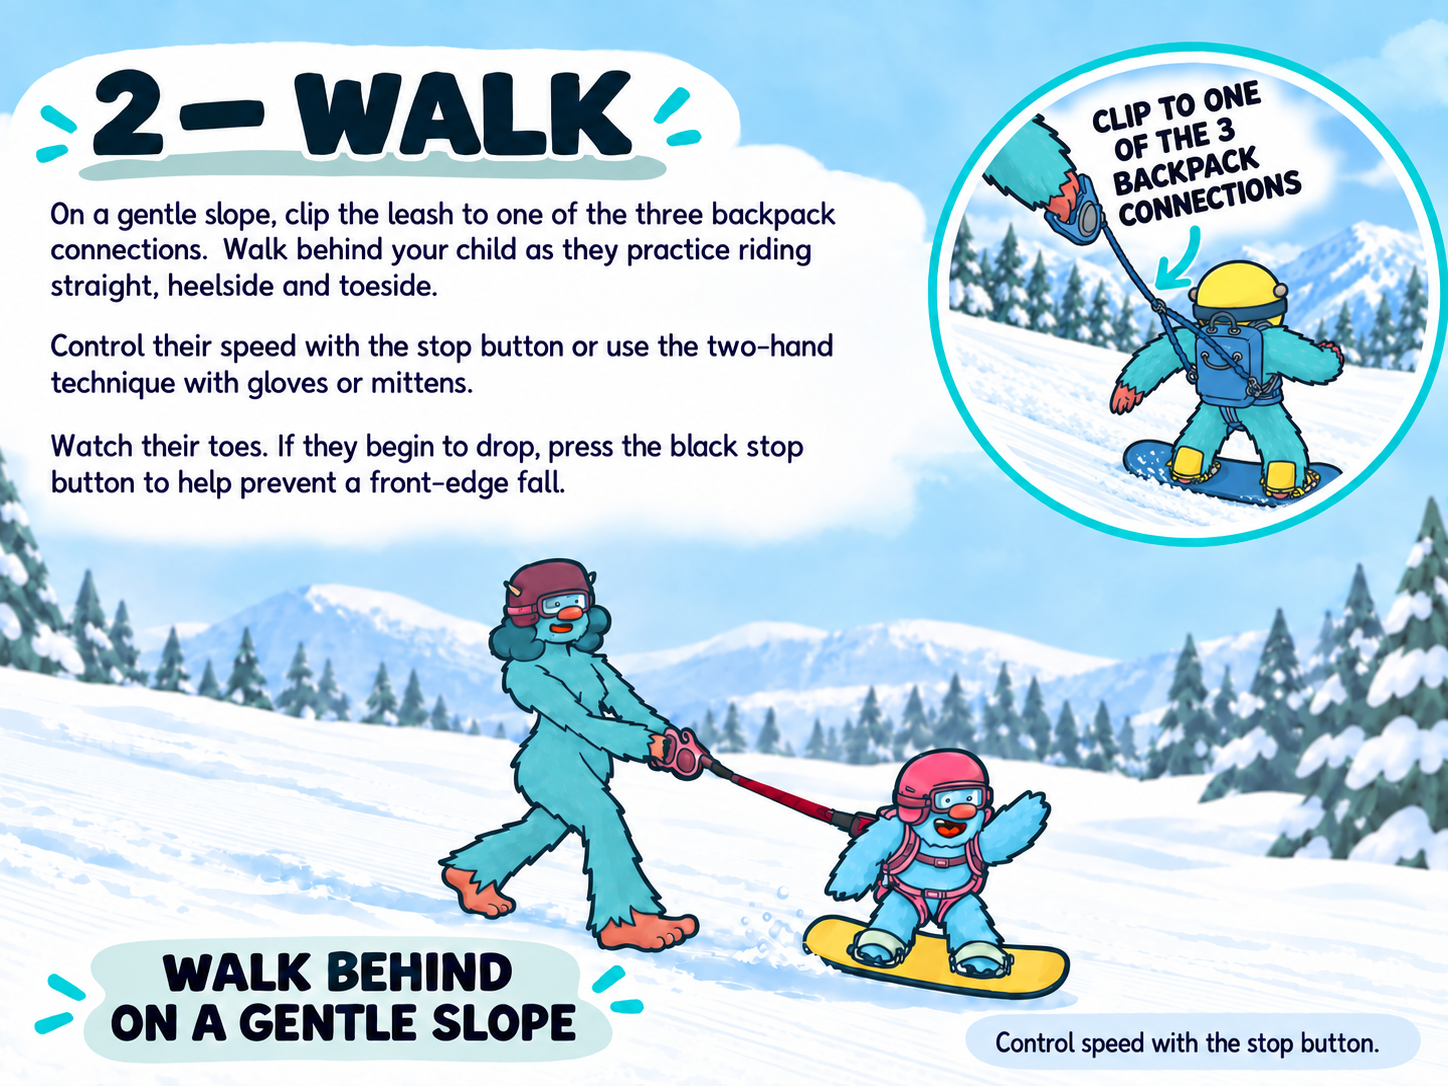
Take the next step on a gentle slope, walking behind your child. Follow the manual for leash use and connections.
View Walk guide (opens in a new tab)Ride
03 / 03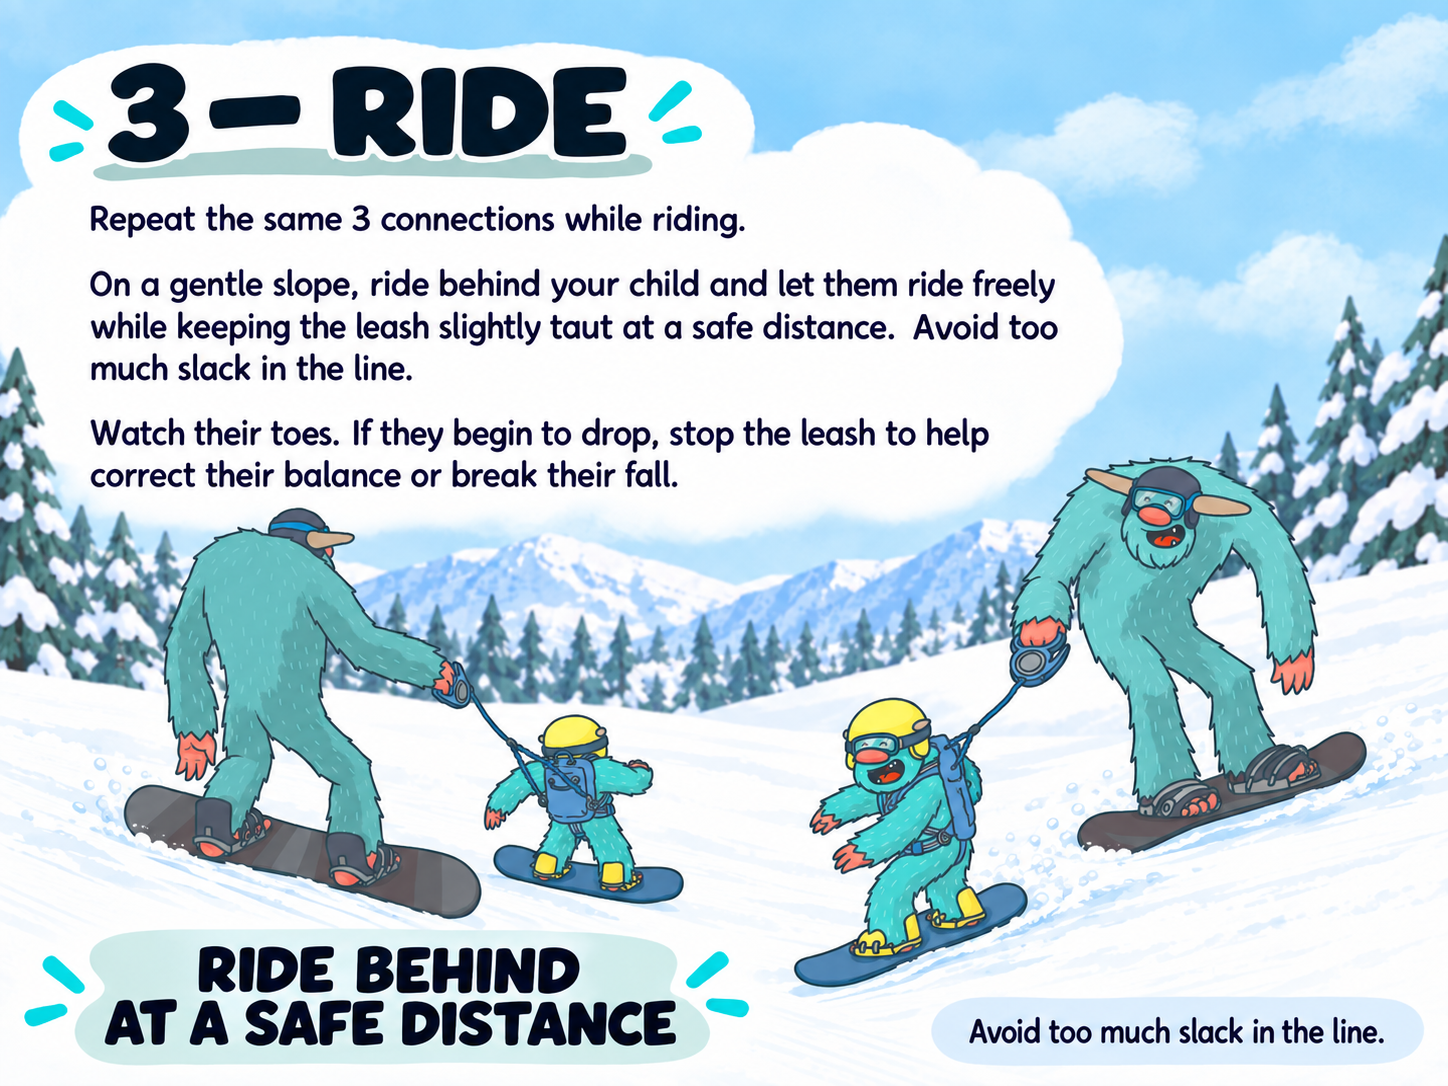
Follow on your snowboard as your child progresses. Use the full guide for riding technique and connection details.
View Ride guide (opens in a new tab)Keep the full instructions close.Use these visual reminders alongside the snowboard harness manual.
Open instruction manual (PDF, opens in a new tab)Connection points
Which connection point should I use?
The harness has multiple connection options. The point you use can vary with your child’s learning stage and the situation.
“OD” CONNECTION
Straight / centred riding
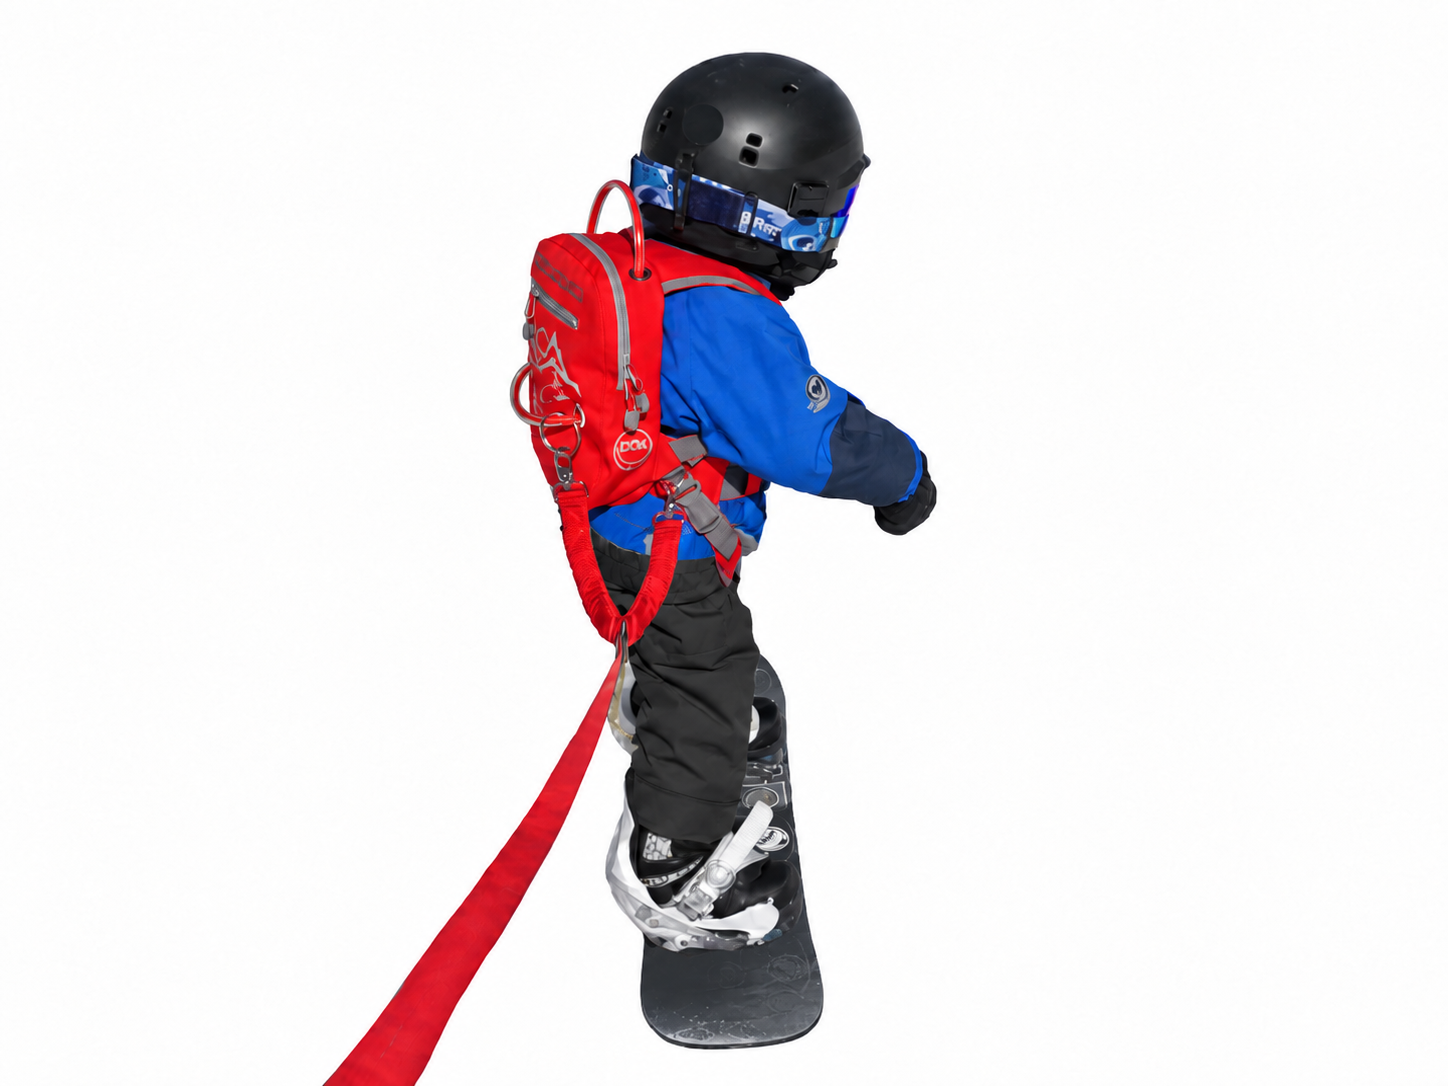
Attach one bungee cord to the “D” ring and the other to the “O” ring to practise going straight downhill.
“Y” CONNECTION
Heel-side & toe-side practice
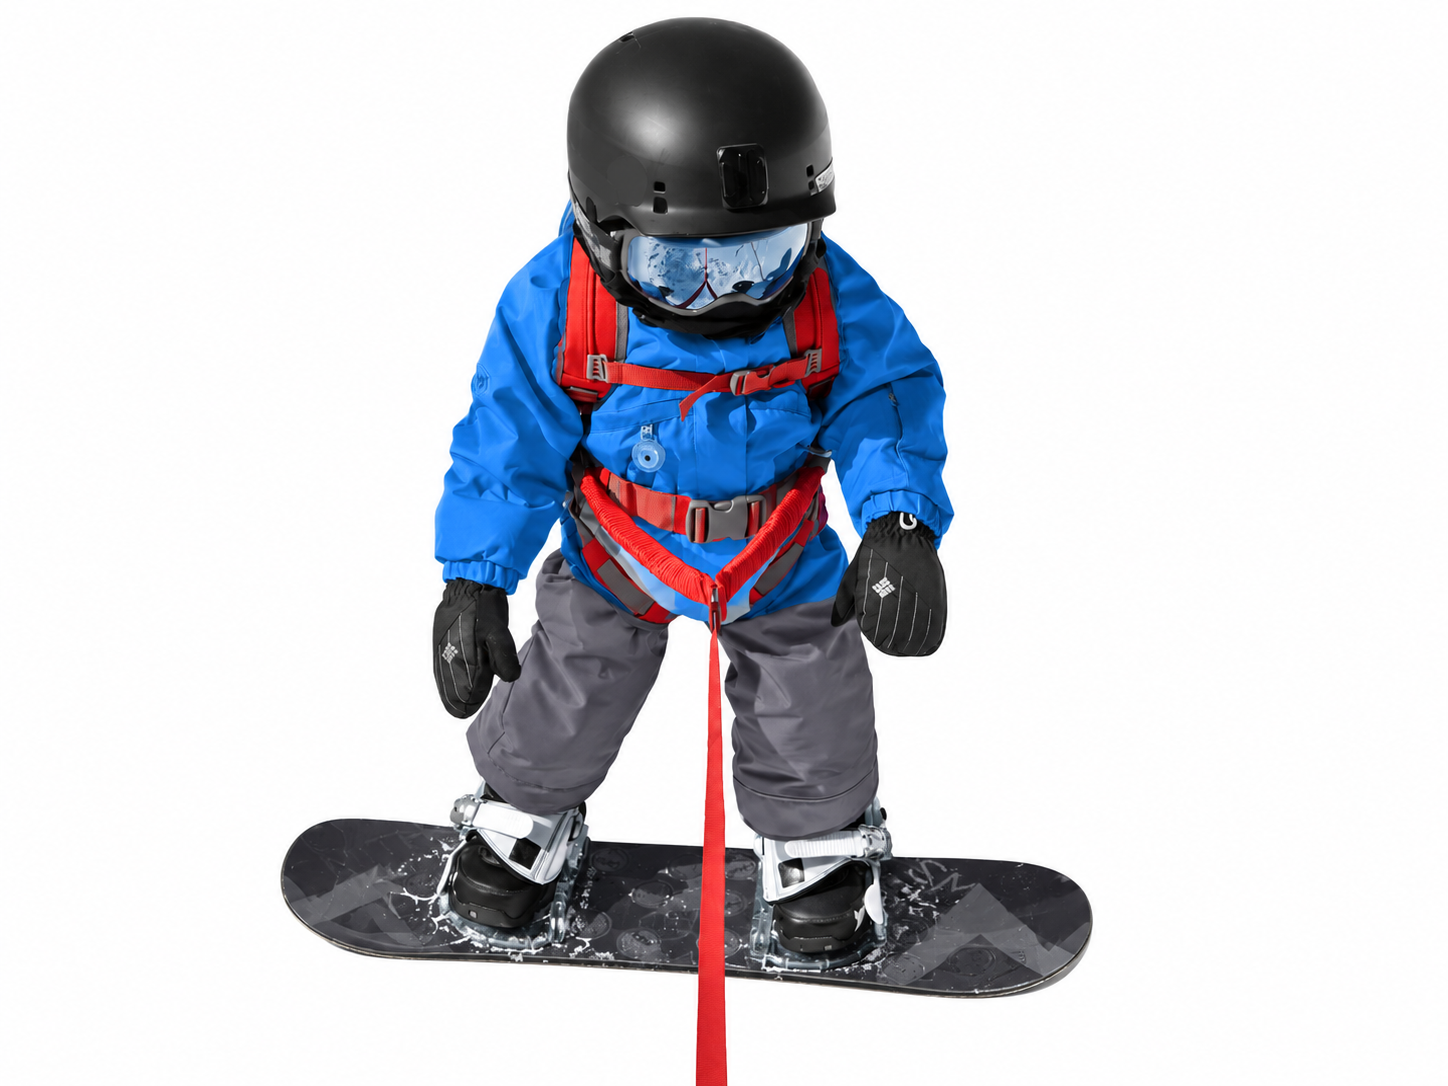
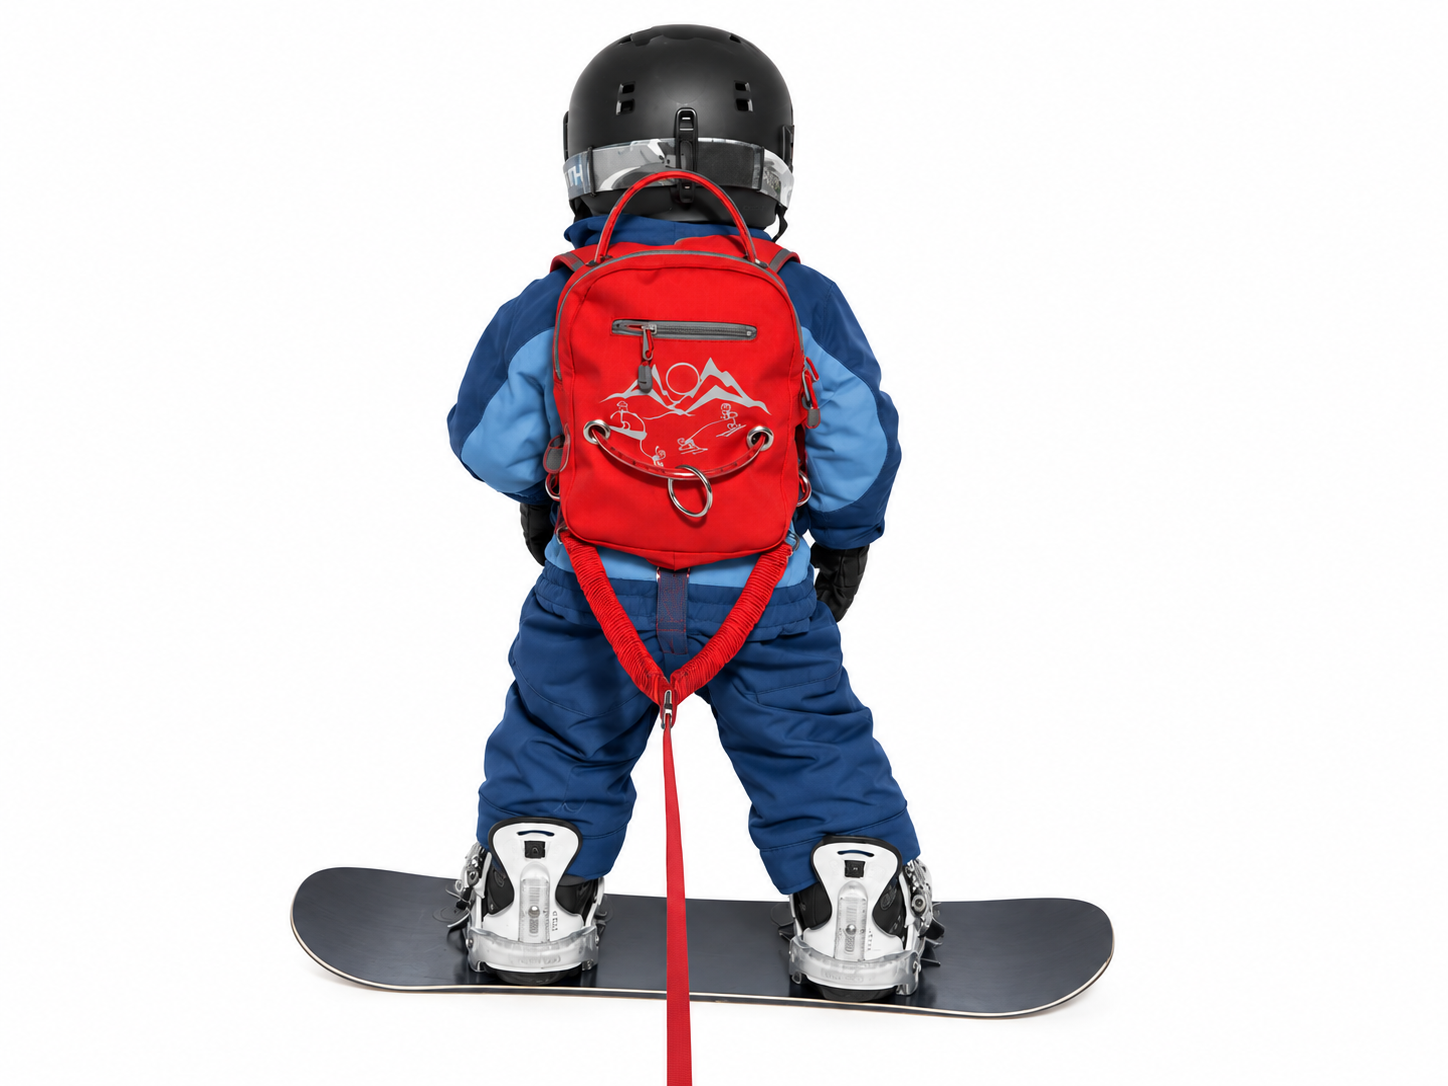
Connect one bungee on each side of the hips. This connection helps practise heel-side and toe-side riding. The same connection is used for skiing in Y-GO and Y-TOW mode.
“O” CONNECTION
Linked turns
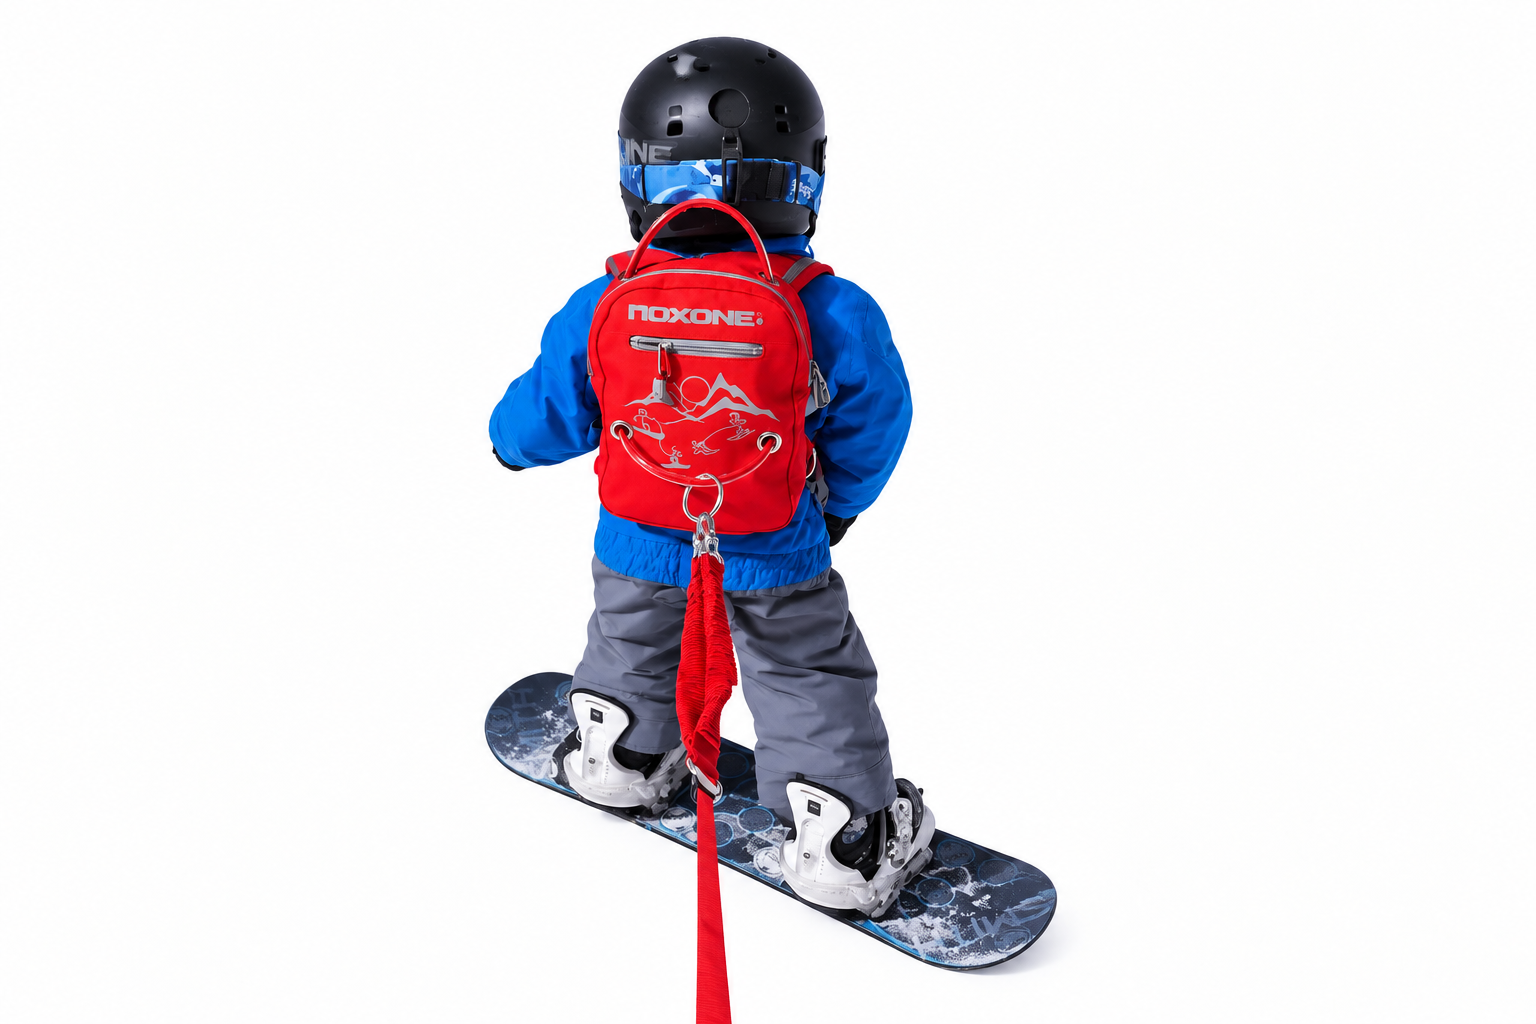
Attach both bungee cords to the “O” ring when the child is linking turns.
Before, during & after
Quick safety
checklist.
Four visual reminders to revisit throughout your day. Open a step to see the graphic and read the reminder.
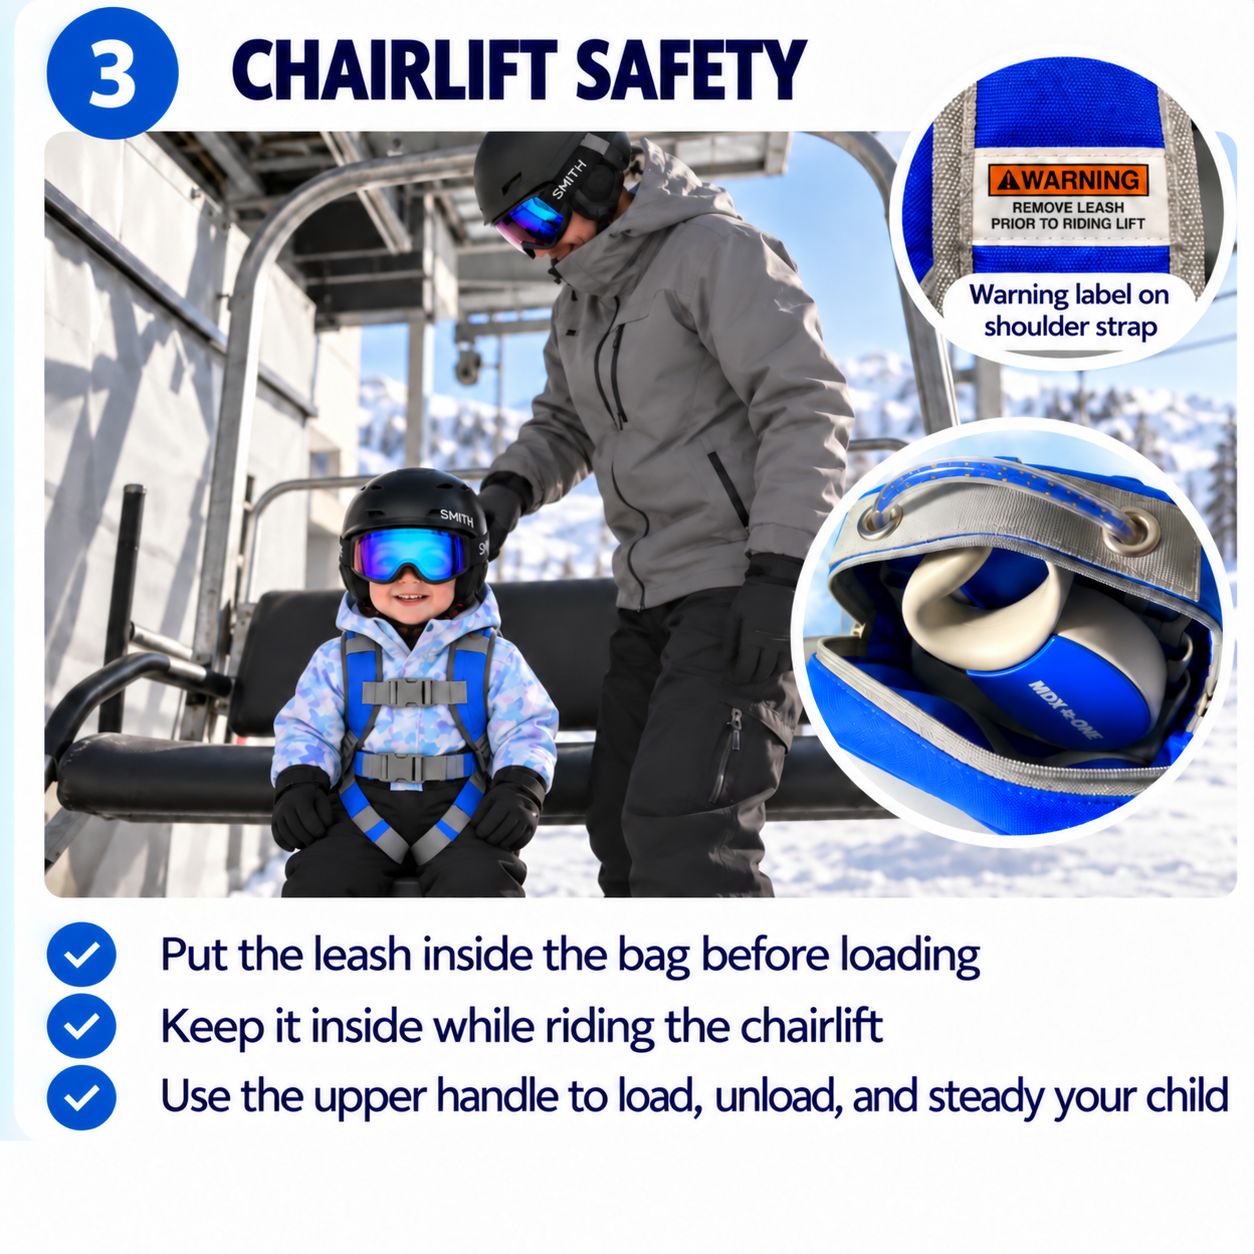
Always disconnect the leash, including both bungees, from the backpack when getting on or off the chairlift.
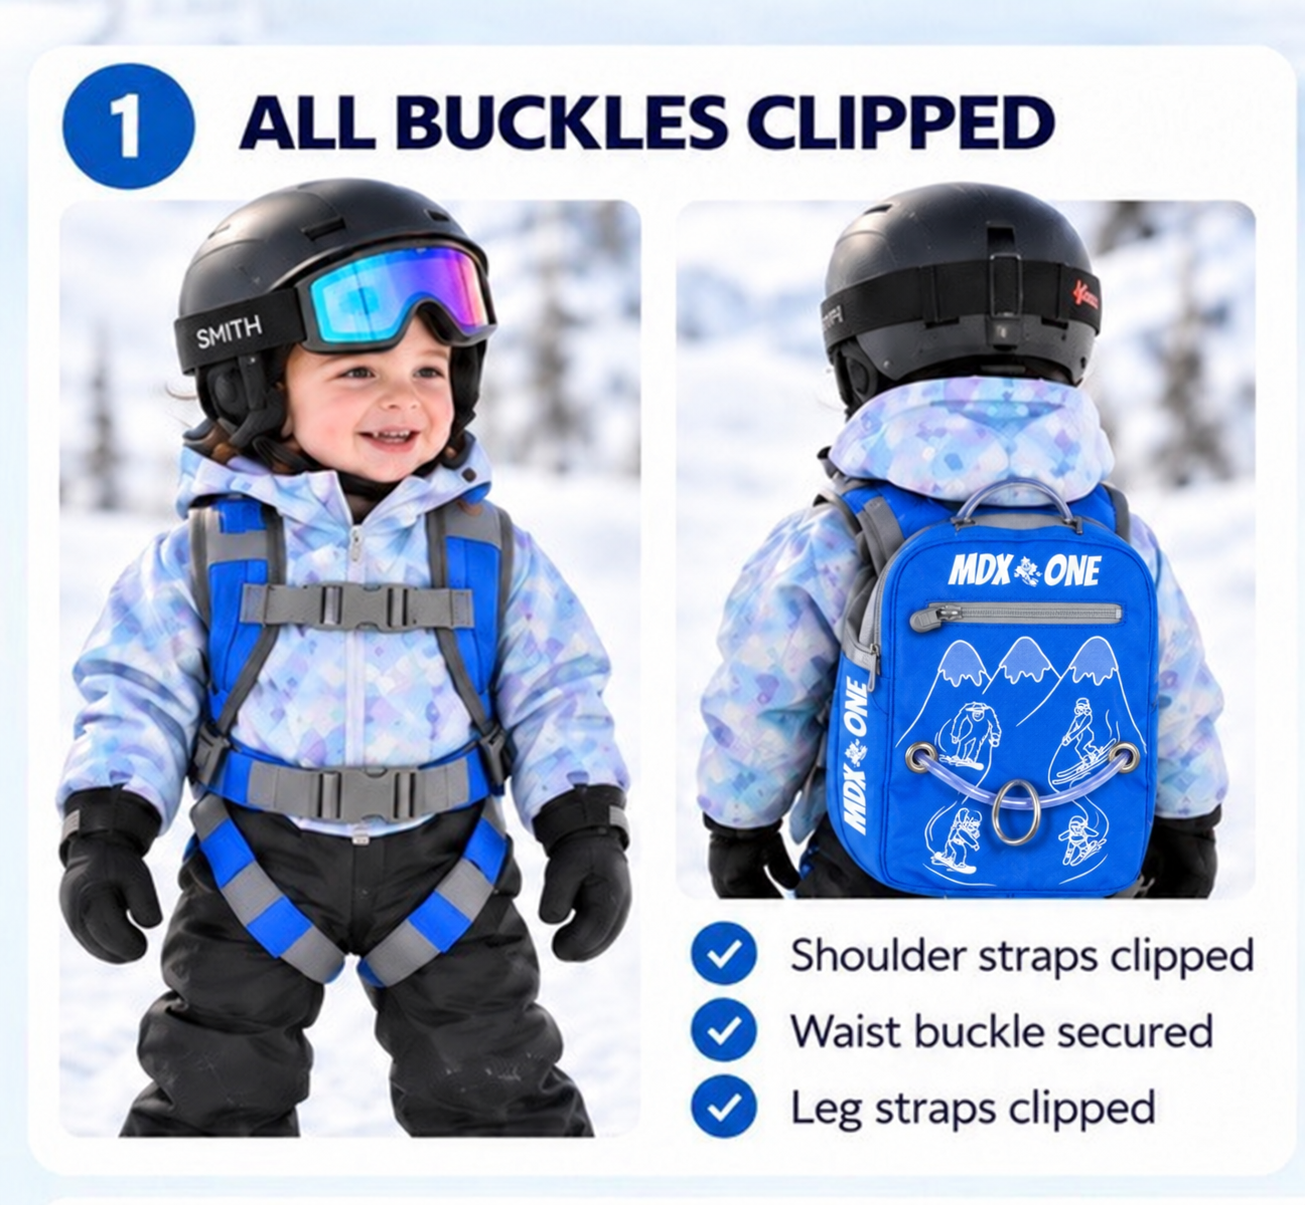
01 All buckles clipped
Check the harness fit, buckles and straps before starting. Follow the fitting instructions in the manual.
 Open full-size graphic (opens in a new tab)
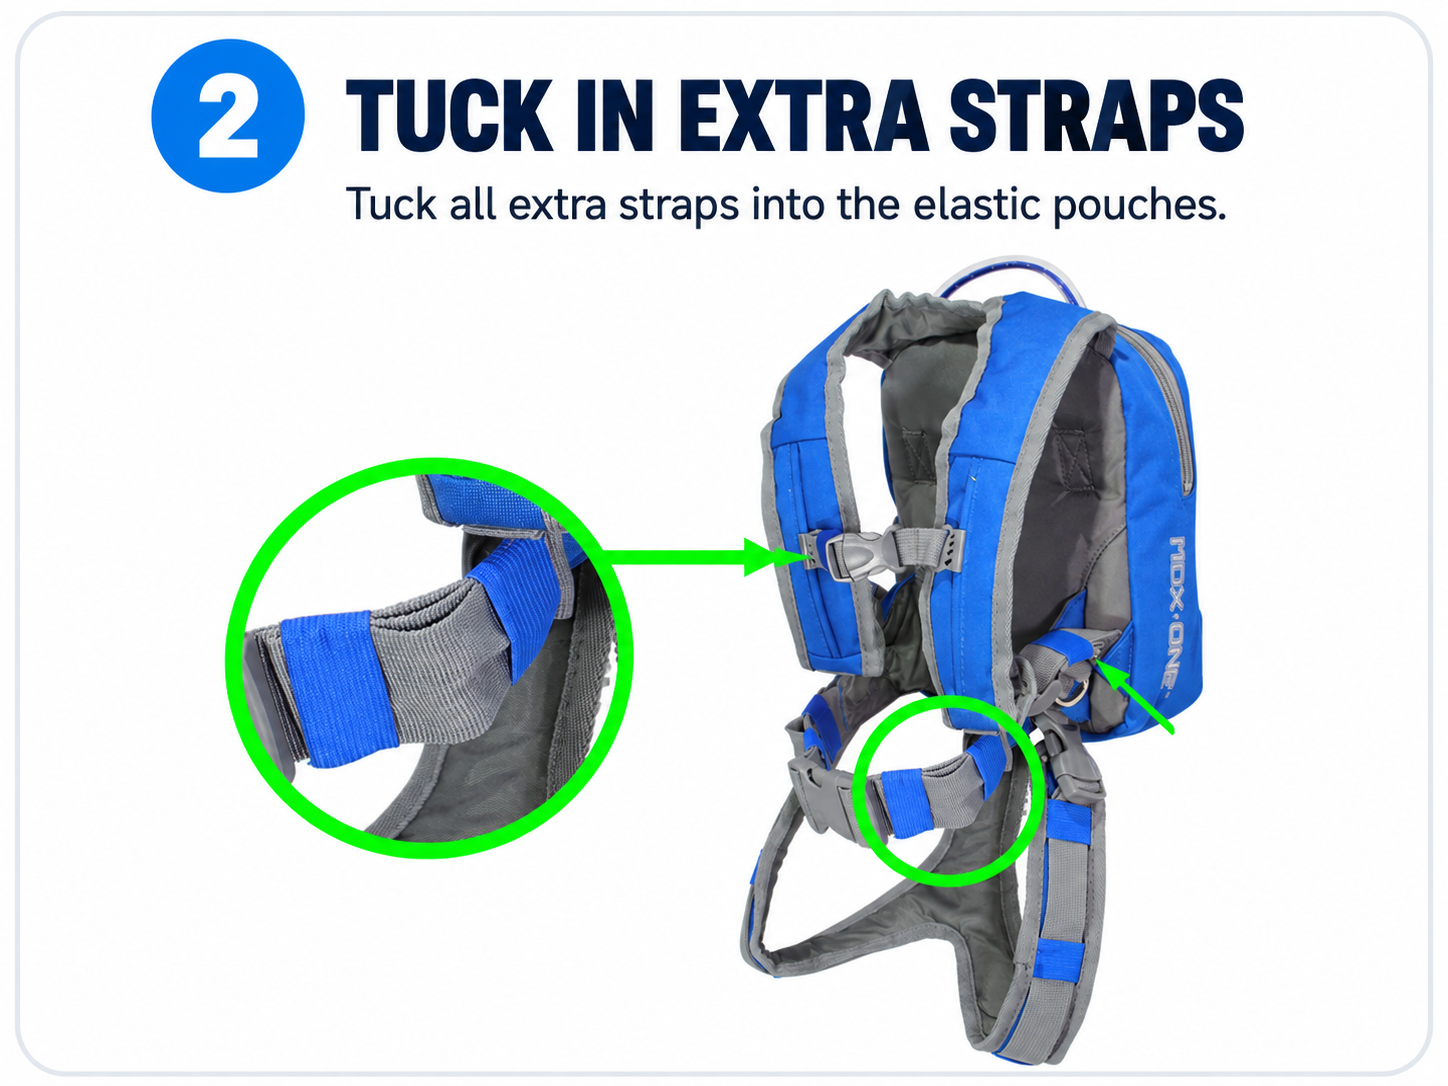
02 Tuck in extra straps
Use the elastic strap pouches to keep extra strap length tucked away, as shown in the manual.
 Open full-size graphic (opens in a new tab)
03 Chairlift safety
Disconnect the leash and both bungees from the backpack when getting on or off the chairlift. Review the full manual and follow the lift operator’s instructions.
 Open full-size graphic (opens in a new tab)
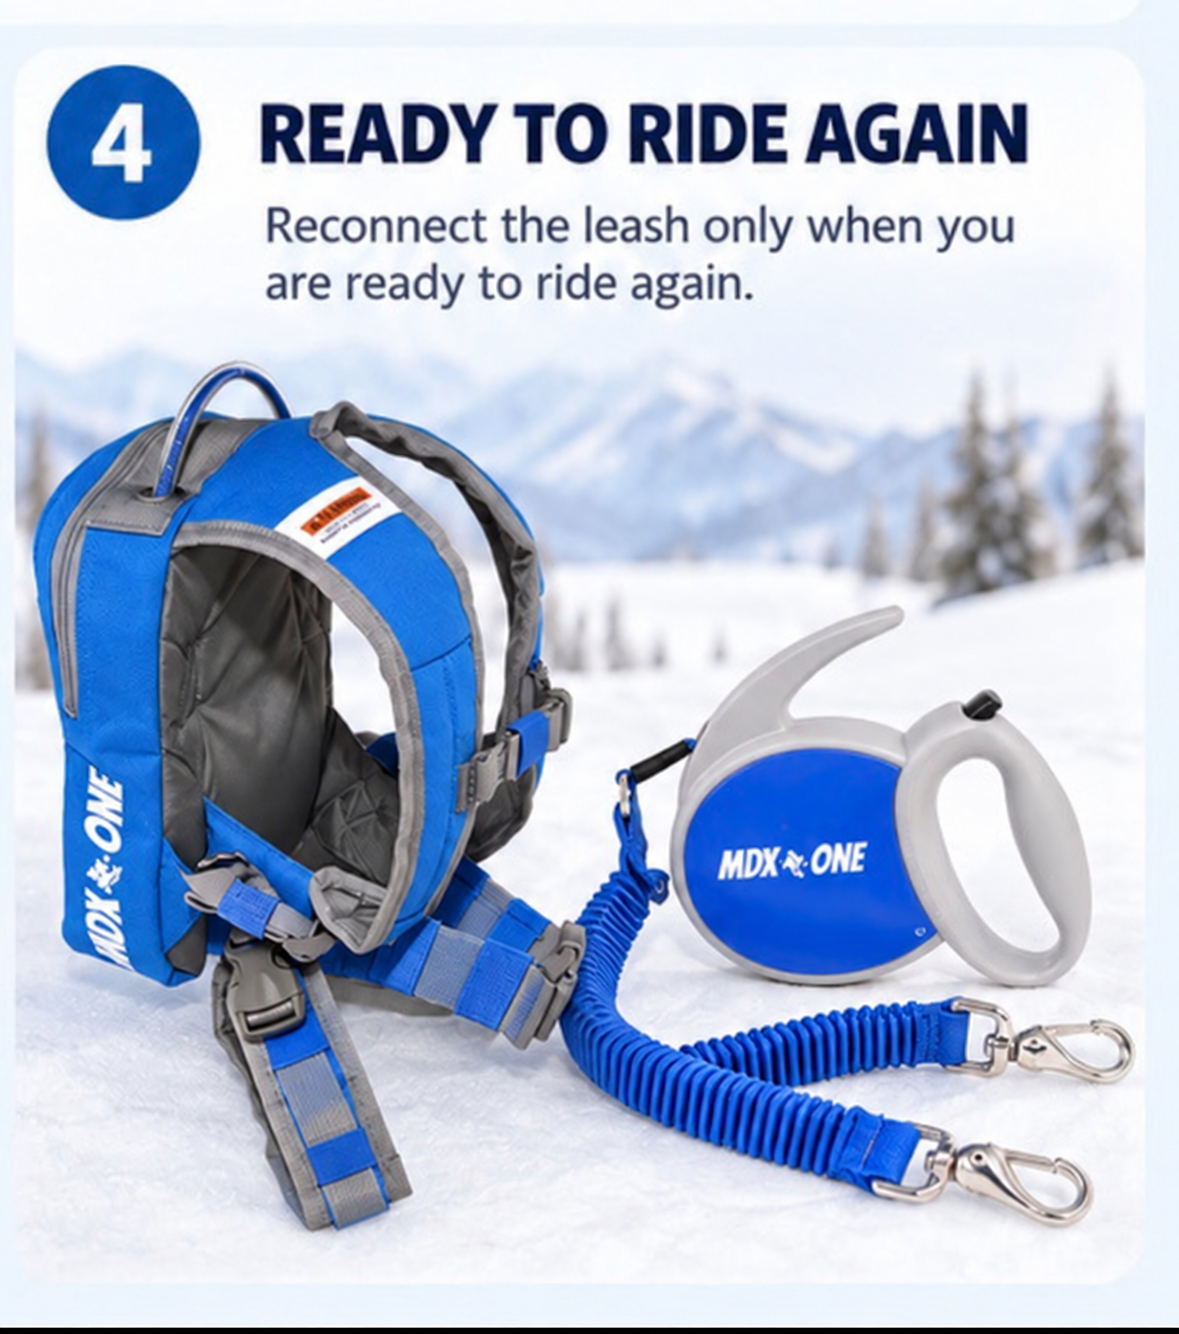
04 Ready to ride again
Before the next run, take another moment to check the harness, straps and leash setup using the guide.
 Open full-size graphic (opens in a new tab)
Shared mountain time
What helps in
the real world.
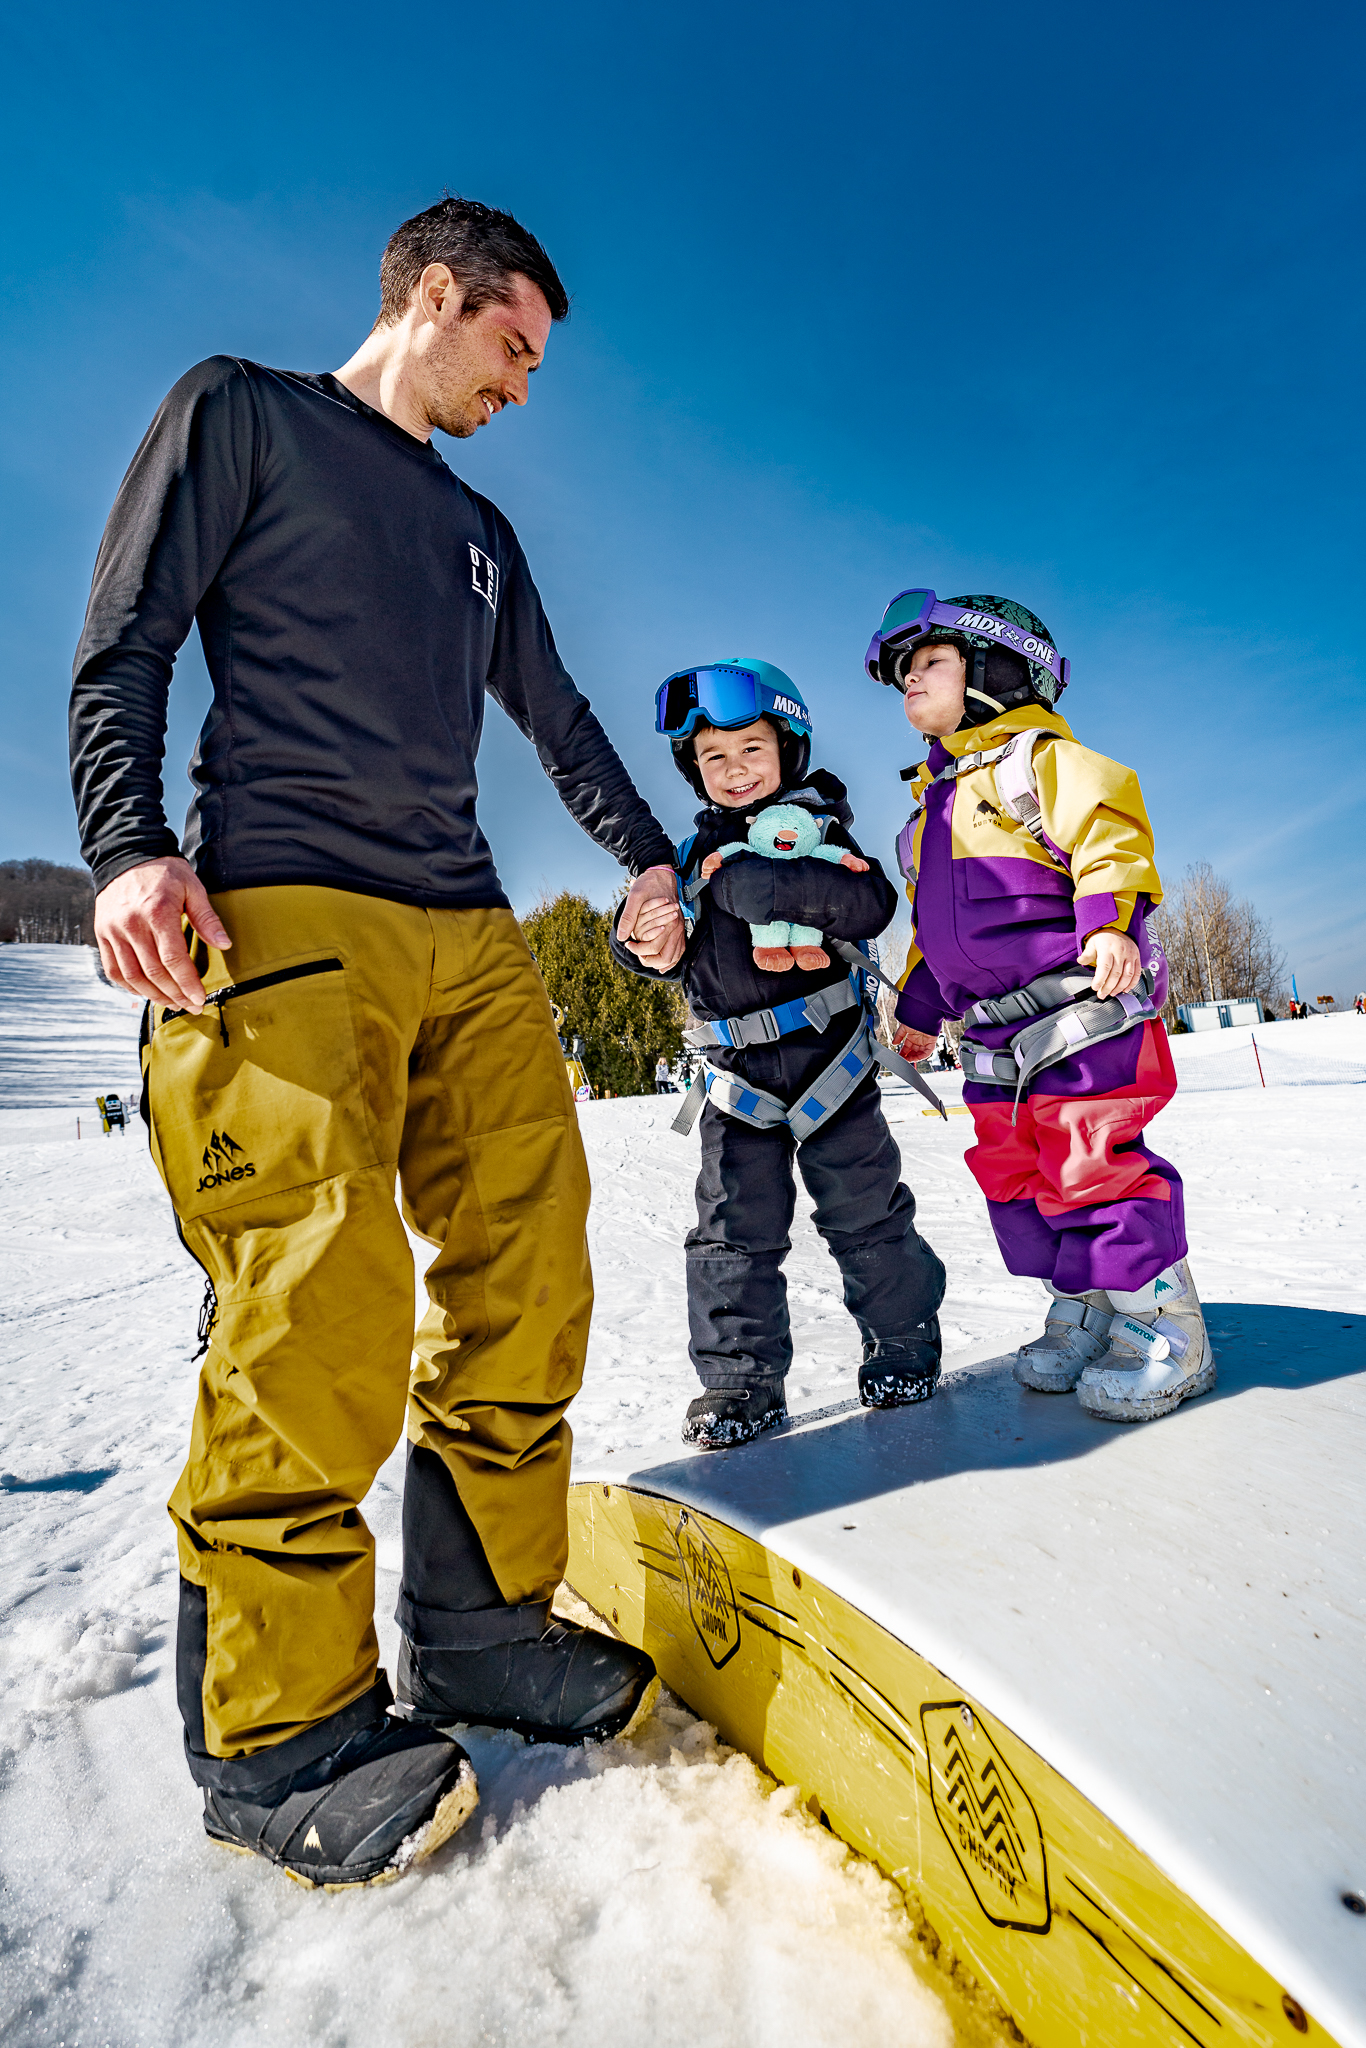
Some days are about a first glide. Others are about a snack break in the snow. Leave room for both.
- Start simple. Try flat terrain when possible, before heading to the hill.
- Keep it short. Make the first sessions manageable and leave room for breaks.
- Pack a snack. A favourite snack can give everyone something to look forward to.
- Bring a little buddy. Tuck a favourite toy in the backpack for the adventure.
- Celebrate the small wins. Getting ready, trying again or a first glide can all be part of a good day.
Parent Q&A
A few things you
might be wondering.
Practical starting points for your family. For harness setup and use, always refer to the instruction manual.
What attachment point should I use?
The connection depends on the learning stage and the activity. Use the “Backpack Connections” diagrams in the instruction manual to choose the setup.
Go to connection guidanceWhen do I use Pull vs Walk vs Ride?
Pull introduces the board on flat ground. Walk has you walking behind your child on a gentle slope. Ride has you following on your snowboard as your child progresses. The manual explains the setup and use for each stage; there’s no need to rush through them.
Revisit the three guidesWhat do most parents find easiest at first?
There isn’t one starting point that suits every family. A simple option is a short session on flat ground: practise the setup while your child gets a feel for the board. Treat this as a starting idea, rather than a rule about what works for every parent.
What bribes work?
A snack break can be a pretty good negotiation tool! Bring a favourite snack and tuck a favourite toy into the backpack. Little comforts and something to look forward to can help keep little riders happy and engaged. Follow your child’s mood and leave room for a break.
Can I use it on flat ground before the hill?
Yes. The Pull stage in the manual starts on flat ground to introduce the feel of the snowboard. Follow its front-binding and bungee setup instructions before trying it.
See the Pull guideWhat do I do on the chairlift?
The manual says to disconnect the leash, including both bungees, from the backpack when getting on or off the chairlift. Review the chairlift graphic and full manual before your session, and follow the lift operator’s instructions.
See the chairlift checklistInstruction manual · PDF
Want the full guide?
Download the complete snowboard harness instruction manual for setup, connection points and step-by-step use.
PDF opens in a new tab
Helpful Winter Reading
A few useful reads for your next family snow day.
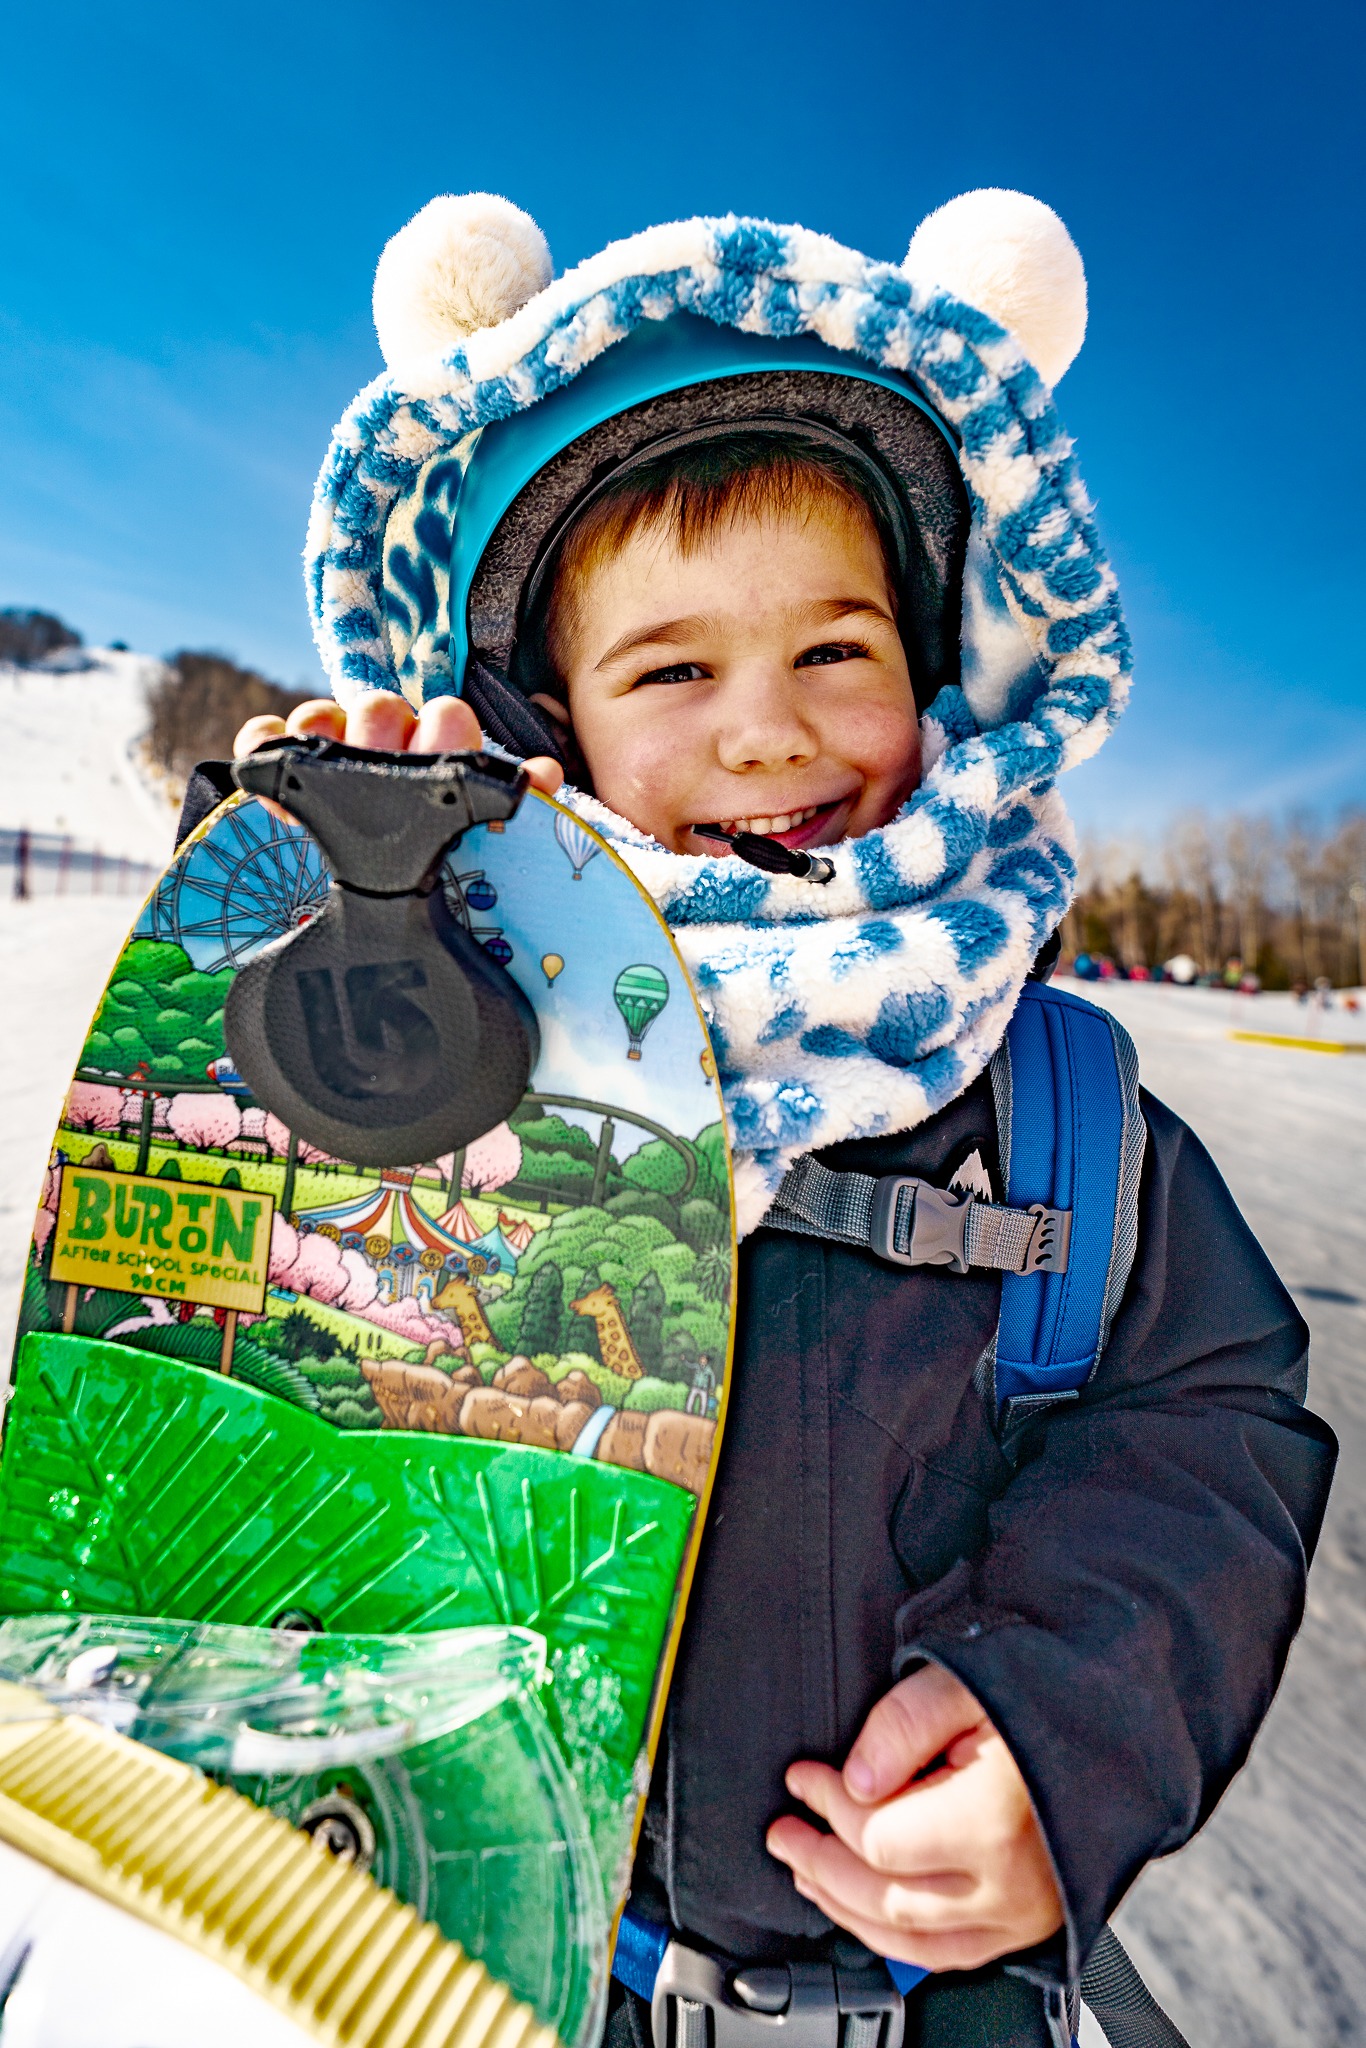
Keeping Kids Warm: The Best Ski Masks Balaclavas
What to look for in a balaclava for cold, snowy days.
Read Article
Choosing the Best Ski Goggles for Your Kid’s Winter Adventures
A guide to goggle fit, comfort and features for young riders.
Read Article
How to Properly Fit Toddler Snowboard Boots: A Guide for Parents
Simple pointers for measuring little feet and checking boot fit.
Read ArticleA little off-snow fun
Bring the mountain
story home.
Save the free Yeti colouring pages for a quiet afternoon, a warm-up break or a little winter daydreaming.
Both colouring designs are included in one PDF. Choose a picture to open it in a new tab.

